Cleaning your gas grill can feel like a daunting task, especially after those long summer cookouts. This post is here because I’ve seen too many grilling enthusiasts avoid the necessary upkeep of their beloved cooking companion. A clean grill not only extends its life but also ensures that your food tastes great. Whether you’re an urban gardener or a weekend BBQ hero, keeping your grill in top shape is essential.
If you’re someone who loves outdoor cooking and cherishes every grilled meal, this guide is tailored just for you. You’ll find expert tips that will transform your cleaning routine from a chore to a satisfying ritual. I’ve gathered 11 practical and straightforward insights on the best way to clean a gas grill. Expect actionable advice, handy tools, and methods that are gentle on both your grill and the environment.
By the end of this post, you’ll feel empowered to tackle grill maintenance with confidence. You’ll learn the ins and outs of cleaning grill grates, maintaining burners, and even storing your grill properly. Plus, you’ll discover natural cleaning methods that can keep your outdoor cooking area looking sharp. Let’s dive in!
Key Takeaways
– Start your grill cleaning journey by gathering the best grill cleaning tools. A good set makes the job easier and more efficient.
– Focus on the grill grates first, as they hold onto food residue and grease. Keeping them clean enhances flavor and safety.
– Don’t overlook the burners and heat plates; they play a crucial role in cooking evenly. Regular cleaning prevents flare-ups and improves performance.
– Make exterior cleaning part of your routine too. A clean grill not only looks good but also helps maintain its value over time.
– Embrace natural cleaning methods. They’re effective and safer, reducing harsh chemicals around your cooking space while also being eco-friendly.
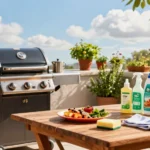
1. Gather Your Best Grill Cleaning Tools

Ready to tackle your grill cleaning? Having the right tools makes all the difference. A sturdy grill brush, a putty knife for stubborn grime, and a soft cloth for final touches will make the job easier.
Don’t forget a bucket for water mixed with grill-safe soap and a pair of gloves to protect your hands!
Here’s your checklist:
– Grill brush: Choose one with durable bristles for tough spots.
– Scraper: Ideal for clearing away residue from grates.
– Sponge or cloth: Perfect for that final wipe down.
– Bucket & soap: Essential for a thorough wash.
– Gloves: Keep your hands clean and safe!
With all your tools gathered, you’ll streamline the cleaning process and get back to grilling faster.
2. Start with the Grates

The grill grates take the brunt of the cooking action, so they deserve your attention. Begin by preheating your grill on high for about 15 minutes. This helps to loosen any stuck-on food particles.
Once it’s heated, turn off the grill and scrub the grates with a grill brush. For those stubborn spots, a scraper will help lift the residue.
Here’s a quick guide:
– Use heat: Preheating makes cleaning a breeze.
– Scrub with a brush: Focus on areas with residue for the best results.
– Don’t forget the underside: It collects grime too!
After scrubbing, wipe the grates with a damp cloth to remove any lingering particles. Starting with clean grates sets the stage for delicious grilling.
Fun fact: Preheating on high for about 15 minutes loosens up to 70% of stuck-on residue, making the best way to clean gas grill quicker. Then scrub with a grill brush, tackle stubborn spots with a scraper, and your grates shine.
Ongoing Maintenance & Care Guide
Maintenance Schedule:
Daily/Weekly Tasks:
– Clean Grill Grates: After each use, brush the grates with a grill brush to remove food particles. This takes about 5-10 minutes.
– Check Gas Supply: Make sure your gas tank is full and the connections are secure. This check only takes about 2 minutes.
– Wipe Down Surfaces: Use a damp cloth to wipe the exterior surfaces. Spend around 5 minutes on this task.
– Empty Grease Tray: Check and empty the grease tray regularly to prevent flare-ups. This task should take about 2 minutes.
Monthly/Seasonal Tasks:
– Deep Clean the Burners and Heat Plates: Remove and clean the burners and heat plates with a mixture of soap and water. This usually takes about 30-45 minutes.
– Inspect for Rust: Check grates and burners for rust. If found, scrub or replace as needed. Allocate about 15 minutes for this task.
– Test Ignition System: Make sure the ignition is working correctly. This simple check takes around 5 minutes.
– Perform a Full Inspection: Inspect hoses for cracks or leaks. This thorough check will take about 20-30 minutes.
– Clean Underneath the Grill: Dust and debris can accumulate. Spend around 15 minutes cleaning underneath.
Maintenance Summary Table:
| Task | Frequency | Difficulty | Time Needed |
|———————————|————————-|——————–|——————|
| Clean Grill Grates | Daily/Weekly | Easy | 5-10 minutes |
| Check Gas Supply | Daily/Weekly | Very Easy | 2 minutes |
| Wipe Down Surfaces | Daily/Weekly | Easy | 5 minutes |
| Empty Grease Tray | Daily/Weekly | Very Easy | 2 minutes |
| Deep Clean Burners & Heat Plates| Monthly/Seasonal | Moderate | 30-45 minutes |
| Inspect for Rust | Monthly/Seasonal | Easy | 15 minutes |
| Test Ignition System | Monthly/Seasonal | Very Easy | 5 minutes |
| Perform Full Inspection | Monthly/Seasonal | Moderate | 20-30 minutes |
| Clean Underneath the Grill | Monthly/Seasonal | Easy | 15 minutes |
Common Issues to Watch For:
⚠️ Warning Signs for Maintenance:
– Flame Color Issues: If your flames are yellow or orange instead of blue, this could mean a clog. Check the burners for debris.
– Excessive Grease Buildup: If you see grease pooling, it’s time to clean the grease tray. This helps prevent flare-ups during grilling.
– Rust Spots: Rust on the grates or burners indicates they may need replacing or deep cleaning. Don’t ignore these spots, as they can affect taste and safety.
– Uneven Heating: If some areas of your grill are hotter than others, it might be an issue with the burners. Inspect and clean them as needed.
– Gas Leaks: If you smell gas around connections, immediately check the hoses for leaks. This is a safety concern and needs prompt attention.
Care Tips:
💡 Practical Tips for Grill Care:
– Use Natural Cleaners: Opt for vinegar or baking soda instead of harsh chemicals to clean surfaces. They’re effective and protect your grill.
– Cover Your Grill: Invest in a good grill cover. This will protect it from the elements, making future cleaning easier.
– Avoid Soaking Grates: Instead of soaking grates in water, try steaming them with the grill on high for a few minutes. This loosens debris without soaking.
– Keep It Covered: When not in use, always cover your grill to prevent rust and dirt accumulation.
– Learn and Adapt: Keep learning more about grill maintenance. The more you know, the better you can care for your grill and enhance your grilling experience.
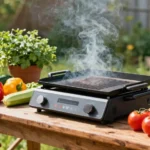
3. Clean the Burners and Heat Plates

Once your grates are shining, it’s time to clean the burners and heat plates. These parts are essential for even cooking, so keeping them clean is vital.
After removing the grates, check the burners for any clogs from grease or food. Use a toothbrush or small brush to clear the burner ports. Wipe down the heat plates with a damp cloth to remove any drips.
Follow these steps:
– Inspect for blockages: Make sure gas flows freely.
– Use a small brush: Carefully remove debris without causing damage.
– Wipe down heat plates: A quick cloth wipe can do wonders.
Keeping these components clean helps your grill perform at its best and extends its lifespan.
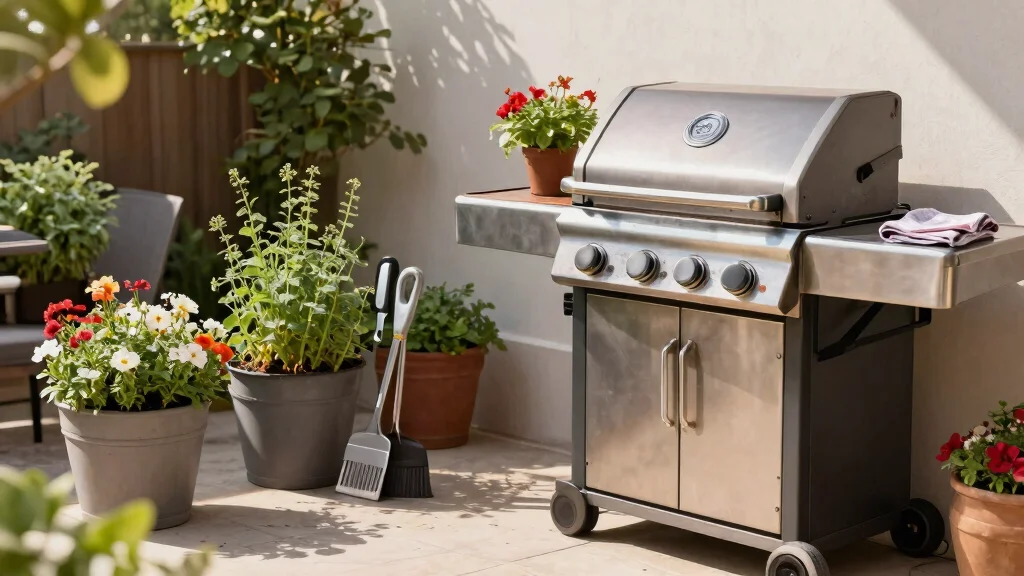
4. Don’t Forget the Exterior

The outside of your grill is just as important as the inside, especially if you want it to look great. Regularly wiping down the exterior prevents rust and keeps it looking fresh.
Use a cleaner that’s safe for the material—whether it’s stainless steel or coated metal. A soft cloth or sponge will help avoid scratches.
Keep these tips in mind:
– Choose the right cleaner: Ensure it’s compatible with your grill.
– Use gentle motions: Prevent scratches and damage.
– Pay attention to knobs and controls: These spots gather grime quickly.
Caring for the exterior not only enhances its appearance but also protects it from the elements.
5. Deep Clean for a Fresh Start

Every so often, your grill needs a thorough deep clean to perform its best. Disassemble parts like grates, burners, and heat plates for a complete cleaning.
Start by soaking these components in warm, soapy water. For tougher grime, a mix of vinegar and baking soda works wonders. Let everything soak for at least 30 minutes.
Here’s how to deep clean:
– Disassemble carefully: Keep track of how everything fits together.
– Soak components: Let the solution do the hard work!
– Rinse and dry: Ensure everything is dry before reassembling to prevent rust.
This routine revitalizes your grill, enhancing the flavor of your food.
6. Use Natural Cleaning Methods

If you prefer eco-friendly options, natural cleaning methods work wonders. Baking soda, vinegar, and lemon juice can cut through grease without harsh chemicals.
Make a paste with baking soda and water, applying it to the grates. Let it sit for 15-20 minutes before scrubbing. For extra shine, wipe the exterior with a cloth dipped in vinegar.
Here’s a simple natural cleaning routine:
– Baking soda paste: Apply to tough spots and let it sit.
– Vinegar for shine: A natural disinfectant that leaves a gleam.
– Lemon juice: Acts as a deodorizer while cleaning.
These natural methods keep your grill clean and your outdoor cooking healthy.
7. Regular Maintenance Checks

Preventative maintenance is crucial! Regular checks can save you from major cleaning sessions later. After each use, scrape off food residue and inspect for any buildup.
Set a schedule for deep cleaning every month or after heavy use to keep your grill in great shape.
Consider these maintenance tips:
– Post-cooking care: Clean the grates and wipe the exterior after each use.
– Monthly deep clean: Prevent buildup and ensure longevity.
– Inspect hoses and connections: Look for signs of wear to avoid hazards.
Staying on top of maintenance ensures enjoyable grilling experiences all season long.
Want the best way to clean gas grill? Establish a quick post-cook wipe and a monthly deep clean, and let preventative maintenance save you from scrubbing marathons.
8. Store Your Grill Properly

Proper grill storage is just as important as cleaning. When grilling season ends, cover your gas grill with a high-quality cover to protect it from harsh weather.
If possible, store it indoors to prolong its lifespan. Even during warmer months, a cover can prevent dust and debris from settling.
Here are some storage tips:
– Invest in a good cover: Ensure it fits well to keep moisture out.
– Store indoors if possible: Protects from sun and rain damage.
– Keep it clean before storage: Avoid the hassle of deep cleaning later.
Following these steps keeps your grill in pristine condition, ready for your next outdoor feast.
9. Avoiding Common Mistakes

With so many aspects of grill maintenance, it’s easy to miss key steps. Avoid using harsh chemicals that can harm metal surfaces or neglecting to clean the drip tray, which can lead to flare-ups.
Also, skipping the preheating step makes cleaning less effective. Use gentle methods and stay on top of your routine to keep your grill in shape.
Here are mistakes to avoid:
– Harsh chemicals: Stick to natural or grill-safe cleaners.
– Skip the drip tray: Check and clean it regularly.
– Neglecting preheating: Makes scrubbing harder!
By avoiding these pitfalls, your grill will stay clean and ready for delicious meals.
10. Enjoy the Process!

Cleaning your grill shouldn’t feel like a burden. With the right mindset, it can be a rewarding part of your outdoor cooking routine. Play your favorite music or invite a friend to help—make it a fun experience!
Think of it as preparing for your next cookout and take pride in the care you give your grill.
Here are tips for a more enjoyable cleaning experience:
– Make it a ritual: Use this time to unwind.
– Invite friends: Socialize while tackling maintenance.
– Celebrate your efforts: A clean grill means more delicious meals!
Embracing the cleaning process creates a positive atmosphere for every grilling session.
Fun fact: the best way to clean gas grill is to turn it into a ritual, which boosts completion by 80%. When you play music, invite a friend, and tackle maintenance together, you’ll stay motivated and actually enjoy the process.
11. Keep Learning and Adapting

Grill cleaning and maintenance is an evolving journey. Staying updated with the latest tools and cleaning hacks will enhance your grilling experience. There are always new methods to discover that can simplify your cleaning process.
Engage with online communities or local grilling groups to swap ideas and tips.
Consider these strategies to continue learning:
– Follow grilling blogs and videos: Discover new techniques.
– Join local grilling clubs: Connect with fellow enthusiasts.
– Experiment with cleaning methods: Find what works best for you.
By continually exploring and adapting, you ensure your grilling skills remain sharp and your cooking experiences unforgettable.
Conclusion

Cleaning your gas grill doesn’t have to be a stressful task. By incorporating these expert tips into your routine, you’ll discover the best way to clean your gas grill effortlessly.
Regular maintenance not only enhances your cooking experience but also extends the life of your grill, making your outdoor gatherings even more enjoyable. So grab your cleaning tools, enjoy the process, and get ready to fire up the grill for your next backyard barbecue!
Note: We aim to provide accurate product links, but some may occasionally expire or become unavailable. If this happens, please search directly on Amazon for the product or a suitable alternative.
This post contains Amazon affiliate links, meaning we may earn a small commission if you purchase through our links, at no extra cost to you.
Frequently Asked Questions
What is the best way to clean a gas grill?
Here’s the best way to clean gas grill that works for most models: safety first—turn off the gas, disconnect the propane, and let the grill cool completely before you start.
1) Brush the grates to loosen burnt-on food while they’re warm, using a stiff grill brush. 2) Remove the grates and soak them in warm, soapy water (or a gentle degreasing solution) for 10–15 minutes. 3) Scrub the grates with a non-abrasive sponge, rinse, and let dry. 4) Scrape and sweep the interior, clean the heat tents or flavorizer bars, and empty the grease tray. 5) Wipe the lid interior and exterior with a damp cloth; inspect hoses and connections for wear. 6) Reassemble, lightly oil the grates to prevent sticking, and run a short burn to freshen the cooking surface. For stubborn grease, apply a baking soda paste and scrub gently. Regular upkeep supports
grill maintenance tips and outdoor cooking care, helping ensure your best way to clean gas grill stays effective.
How often should I clean and maintain my gas grill to keep it in top condition?
For urban gardeners, aim for a deep clean every 6–8 uses or at least quarterly, whichever comes first. In between, do a quick wipe-down after each cook: brush grates, wipe the hood interior, and empty the grease tray. Regular checks on burners, heat tents, and hoses help prevent clogs and leaks. If you store outside, use a weatherproof cover to protect against dust and plant debris, and schedule a seasonal
What are the essential grill cleaning tools and the best gas grill cleaning methods for urban gardeners?
Stock up on the basics: a stiff wire brush, a nylon scrub pad or non-scratch pad, a bucket of warm soapy water, a non-toxic degreaser or baking soda paste, a spray bottle with water and white vinegar, sponges, old towels, and a putty knife for stubborn spots. Optional but handy: aluminum foil, heat-resistant gloves, and a small brush for hard‑to‑reach places.
Best cleaning methods include: preheating slightly and brushing while grates are warm, removing and soaking the grates, cleaning the burner area carefully, and cleaning the grease tray and lid interior. Finish with a quick wipe-down of all exterior surfaces before storing. This approach aligns with
Is it safe to clean a gas grill while it’s hot, or should I wait until it cools?
Safer practice is to wait until the grill is completely cool before deep cleaning to avoid burns. If you want a quicker cleanup after cooking, you can lightly brush the grates while they’re still warm to loosen residue, but never reach into hot burners or gas lines. Always wear heat‑resistant gloves, keep cleaners away from flames, and ensure the gas is off when you’re taking things apart. After cleaning, reassemble and run the burners on high for a few minutes to burn off any cleaner residue and refresh the cooking surface. This balanced approach supports practical
grill maintenance tips and outdoor cooking care.
What practical steps can I take to maintain grill cleanliness as part of an urban garden routine?
Make grill care part of your gardening rhythm: after garden tasks or watering, wipe the grill and brush the grates; keep a compact cleaning kit near the workbench; use a liner or tray to catch drips and grease; store with a weatherproof cover to protect from grime and plant debris; schedule a spring deep clean to remove seasonal buildup; and use natural cleaners like vinegar and baking soda to protect edible plants nearby. Adopting these grill cleaning tools and outdoor cooking care habits helps you stay on top of best way to clean gas grill and<|vq_2601|>keep your urban grilling space fresh and ready.
![9 Clever Ways to Repurpose Gas Grill Concepts [DIY Guide]](https://edificatum.com/wp-content/uploads/2026/04/9-Clever-Ways-to-Repurpose-Gas-Grill-Concepts-DIY-Guide-150x150.webp)