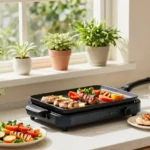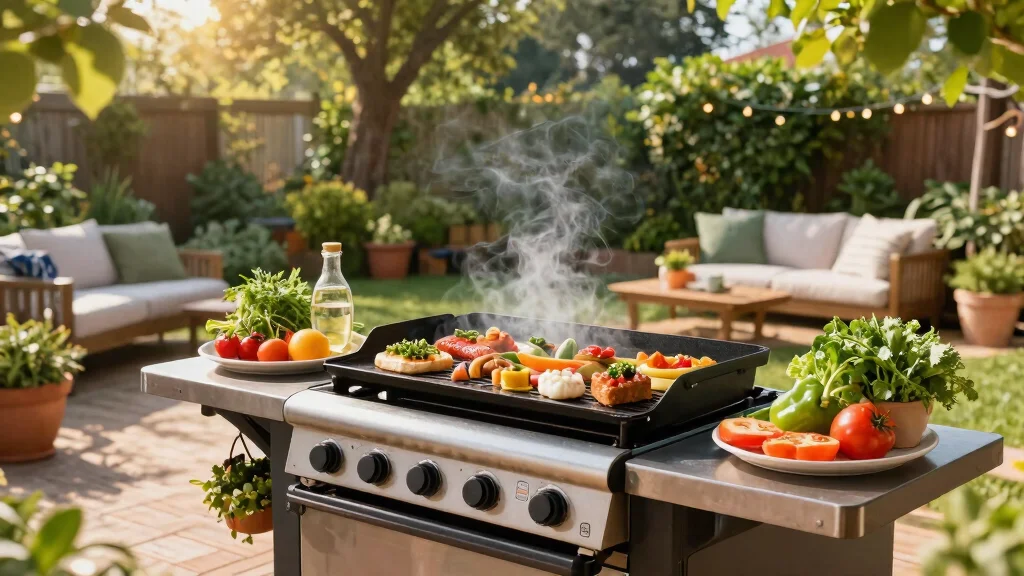
Cooking outdoors has a special charm, especially when you fire up a Blackstone griddle. The sizzling sound of food hitting the hot surface, the delightful aroma wafting through the air, and the joy of sharing a meal with loved ones make outdoor cooking a memorable experience. This post aims to take the guesswork out of using your new griddle. Whether you just unboxed yours or you’re still considering a purchase, I’ve created this guide to help you get the most out of your Blackstone griddle.
If you’re a beginner eager to dive into the world of outdoor cooking, you’re in the right place. You might feel overwhelmed by different cooking techniques, maintenance tips, and griddle accessories. But don’t worry! I’ve gathered ten essential Blackstone griddle tips tailored just for you. You’ll learn how to cook like a pro, maintain your equipment properly, and discover beginner-friendly recipes that will impress your friends and family.
By the end of this post, you’ll have the confidence to tackle any dish on your griddle. You’ll know how to preheat effectively, utilize different heat zones, and even tackle unpredictable weather. So, grab your spatula and let’s get started on making your outdoor cooking adventures enjoyable and delicious!
Key Takeaways
– Preheat Like a Pro: Always preheat your Blackstone griddle for optimal cooking. This ensures even heat distribution and better searing.
– Master Your Cooking Techniques: Learn to use different heat zones for cooking various foods at the same time, allowing for maximum efficiency.
– Invest in the Right Accessories: Use high-quality grilling accessories that enhance your cooking experience, from spatulas to storage solutions.
– Maintain Your Griddle Properly: Regular cleaning and seasoning of your griddle will prolong its life and improve food flavor.
– Experiment with Recipes: Start with simple beginner griddle recipes to build your confidence and gradually try more complex dishes as you learn.
1. Preheat Like a Pro

Are you eager to achieve that perfect sear on your burgers or golden eggs on your Blackstone griddle? Proper preheating is the secret to making that happen. By letting your griddle warm up for 10 to 15 minutes on medium heat, you ensure even cooking and reduce the risk of food sticking.
When you’re ready for high-heat dishes, crank it up for a few minutes before adjusting back down. A well-preheated griddle not only speeds up cooking but also enhances flavor. Test the heat with a few drops of water—if they sizzle and evaporate quickly, it’s time to start cooking!
– Always preheat for consistent cooking results.
– Avoid cooking on a cold surface to prevent sticking.
– Use a cooking thermometer for accuracy.
With this simple step, you’ll elevate your cooking game significantly!
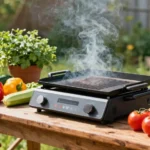
2. Master Your Cooking Techniques

Want to turn your meals from basic to mouthwatering? Mastering various cooking techniques on your Blackstone griddle can make all the difference. Start with simple skills like flipping and sautéing, then explore advanced techniques like searing and caramelizing.
Searing meat is a fantastic way to lock in those delicious flavors. Ensure your griddle is hot enough before adding proteins, and let them sear undisturbed for a few moments. This creates that irresistible crust we all love. For veggies, try frequent tossing to achieve a perfect char without overcooking them.
– Flip proteins smoothly to maintain their integrity.
– Use oil with a high smoke point for frying.
– Practice with different heat zones for versatile cooking.
With time, these techniques will become second nature, making you the star chef at every gathering!
Did you know a 450°F hot zone seals in flavor in just 60 seconds per side on a Blackstone griddle? Use these blackstone griddle tips: start with flipping and sautéing, then master searing and caramelizing for restaurant-quality results.
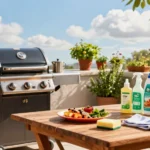
3. Use the Right Grilling Accessories

Ready to enhance your Blackstone griddle experience? The right grilling accessories can make all the difference. Essential tools like a sturdy spatula, durable tongs, and a grill scraper are must-haves. A good spatula allows you to flip delicate foods without tearing them apart.
Tongs are perfect for handling grilled meats while keeping a safe distance from the heat. Don’t forget a grill scraper to keep your griddle clean, which is vital for maintaining delicious flavors during cooking. A cooking oil dispenser can also be a game-changer—having oil on hand makes it easy to lubricate your griddle, preventing sticking and achieving that lovely golden finish.
– Choose heat-resistant accessories for safety.
– Keep your tools organized for a smoother cooking process.
– Invest in a griddle cover to protect your gear when not in use.
With the right tools, you’ll feel like a culinary pro in your backyard!
4. Experiment with Seasonings and Marinades

Are you looking to elevate the flavors in your outdoor cooking? The Blackstone griddle offers endless opportunities for flavor experimentation. Don’t hesitate to use seasonings and marinades to enhance your meals. Marinating proteins for a few hours can make a world of difference, infusing them with delicious flavors.
Create simple marinades using olive oil, vinegar, and your favorite herbs and spices. For example, a blend of soy sauce, garlic, and ginger can make chicken irresistible! When seasoning veggies, a sprinkle of salt, pepper, and a few herbs can work wonders, but feel free to try something bold like smoked paprika or citrus zest for an extra kick.
– Keep a variety of spices at hand for instant flavor upgrades.
– Marinade overnight for deeper flavor infusions.
– Don’t forget to taste as you go to create a perfect blend!
The right seasonings can transform any dish, letting your culinary creativity shine!
Fun fact: marinating proteins for 2-4 hours can boost flavor penetration by up to 70%. These blackstone griddle tips show simple marinades—olive oil, vinegar, garlic, and herbs—unlock bold, crave-worthy meals with your outdoor cooking.
5. Maintain Your Griddle Properly

Want your Blackstone griddle to last? Proper maintenance is essential for longevity and performance. Start by cleaning it after each use. While still warm, scrape off any food residue with a grill scraper and wipe it down with paper towels.
For a thorough clean, do it every few uses with hot soapy water and a non-abrasive sponge. Once cleaned, season the griddle with a thin layer of oil and heat it for a few minutes to maintain its non-stick surface. Be mindful of rust by storing your griddle in a dry place and using a cover to shield it from the elements.
– Always clean while warm for easier residue removal.
– Season the griddle regularly to maintain its quality.
– Store in a covered area to prevent rust buildup.
With consistent care, your griddle will serve up delicious meals for years to come!
6. Try Beginner Griddle Recipes

Feeling unsure about where to start your cooking journey? Beginning with simple recipes can boost your confidence on the Blackstone griddle. A great starter recipe is breakfast hash: combine diced potatoes, bell peppers, onions, and your choice of protein. Cook until everything is tender and crispy, then season to taste for a delightful meal.
Grilled quesadillas are another easy option—just fill tortillas with cheese, meats, and veggies, cook until the cheese melts, and enjoy! These straightforward recipes help you get familiar with the griddle’s heat zones and timing.
– Start with basic recipes before advancing to more complex dishes.
– Use fresh ingredients for the best flavors.
– Don’t hesitate to play with ingredients and flavors as you learn!
These beginner recipes will not only satisfy your taste buds but also build your confidence in outdoor cooking!
Fun fact: starting with quick beginner griddle recipes like a 15-minute breakfast hash and a 10-minute quesadilla teaches timing in under 25 minutes. Those Blackstone griddle tips keep you cooking confidently, with crispy edges and simple seasoning every time.
7. Utilize Different Heat Zones

Do you know how to maximize the vast cooking surface of your Blackstone griddle? Utilizing different heat zones is key to cooking multiple foods perfectly at once. The beauty of the griddle is the ability to create both hot and cooler areas.
For instance, sear proteins on the hotter side while using the cooler side to keep food warm and toast buns. You can also shift food around if it’s cooking too quickly or needs a little more time. This technique helps you manage cooking times and temperatures effectively.
– Experiment with different cooking zones during your cooking sessions.
– Use the cooler side for delicate foods that need lower heat.
– Mastering heat zones can elevate your outdoor cooking skills significantly.
With practice, you’ll become adept at multitasking and timing your meals to perfection!
8. Prepare for Weather Challenges

Are you ready to tackle the challenges of outdoor cooking? Weather can impact your Blackstone griddle experience, so being prepared is essential. Wind, rain, or extreme heat can all affect how your food cooks. Consider using a windbreak or portable cover to shield your griddle from the elements.
Be aware of outdoor temperatures—hot days cook food faster, while cooler weather may require heat adjustments. Always have a backup plan for inclement weather, whether that means moving indoors or using an alternative cooking method.
– Check the weather before planning your outdoor cooking.
– Have a dedicated spot for your griddle that allows for easy setup and protection from elements.
– Prepare a backup cooking strategy in case of sudden weather changes.
With a little preparation, you can enjoy griddling no matter what Mother Nature throws your way!
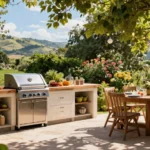
9. Involve Family and Friends

Do you want to make your outdoor cooking experience even more enjoyable? Sharing the cooking journey with family and friends can turn a simple meal into a joyous gathering. Host griddle parties where everyone can take turns cooking or preparing their favorite dishes.
Set up a griddle bar with various toppings for tacos or burgers, allowing everyone to customize their meals. This not only makes cooking fun but also creates lasting memories and strengthens bonds.
– Encourage teamwork by assigning roles like chopping, seasoning, and cooking.
– Make it a social event with music and drinks to enhance the atmosphere.
– Share recipes and cooking tips to inspire creativity among your guests.
Creating a communal cooking environment makes every outdoor session feel special and memorable!
How To Choose Grilling Accessories for Your Blackstone Griddle
Choosing the right grilling accessories for your Blackstone griddle can enhance your outdoor cooking experience. With the right tools, you can make cooking easier and more enjoyable. Here are some key points to consider when selecting accessories:
1. Size of Accessories
Make sure the accessories fit your griddle size. Many griddles come in different sizes, so measure your cooking surface before buying accessories. Look for spatulas, grill brushes, and other tools that are designed specifically for your griddle’s dimensions. This ensures efficient use of space while cooking.
2. Material Quality
Choose accessories made from durable materials. Stainless steel is a great choice for spatulas and tongs because it resists rust and is easy to clean. Silicone utensils are excellent for non-stick surfaces as they won’t scratch your griddle. Always check product descriptions to ensure you’re getting high-quality materials that can withstand high heat.
3. Versatility
Opt for multipurpose tools that can do more than one job. A good spatula can flip burgers, break up ground meat, and serve food. Look for accessories that can be used for various recipes, which saves you money and storage space. Accessories like a grill press or a pancake spatula can add versatility to your cooking.
4. Heat Resistance
When selecting accessories, consider their heat resistance. Tools that can withstand high temperatures are essential for outdoor cooking. Check the maximum temperature rating of utensils, especially if you plan to sear meats. This ensures your tools won’t warp or melt during cooking.
5. Ease of Cleaning
Select accessories that are easy to clean. Look for dishwasher-safe items or those with non-stick properties for quick cleanup. Some materials, like stainless steel, are easier to scrub without damaging. This will save you time after a fun cooking session and keep your cooking surface in great shape.
6. Safety Features
Look for accessories with ergonomic handles and non-slip grips. This can prevent accidents while you’re cooking. Some utensils come with heat-resistant handles to keep your hands safe while grilling. Prioritizing safety ensures a more enjoyable cooking environment.
Pro Tip: Always read reviews and watch videos for feedback on accessories. This can give you insight into their effectiveness and durability. Investing in quality tools will make your cooking experience much more enjoyable and efficient.
10. Embrace the Learning Curve

Are you feeling nervous about using your Blackstone griddle? Embracing the learning curve is part of the journey! It’s perfectly normal to experience a few mishaps as you get comfortable with this new cooking method. Each cooking session, whether a success or a learning opportunity, helps you improve your skills.
Don’t shy away from experimenting with new recipes and techniques. Keep a cooking journal to note what worked and what didn’t, helping you refine your approach over time.
– Celebrate your successes, no matter how small.
– Learn from mistakes and adjust your strategies accordingly.
– Keep an open mind, and enjoy the journey of outdoor cooking!
By embracing this process, you’ll quickly become a confident Blackstone griddler!
Conclusion

Mastering your Blackstone griddle is a rewarding journey filled with delicious meals and shared memories. By following these essential tips, you’ll not only enhance your outdoor cooking skills but also enjoy the process. Keep experimenting, learning from your experiences, and most importantly, have fun!
Engage with fellow griddlers and share your successes and tips. The backyard kitchen is where culinary magic happens, and with each meal, you’ll create new traditions and stories!
Note: We aim to provide accurate product links, but some may occasionally expire or become unavailable. If this happens, please search directly on Amazon for the product or a suitable alternative.
This post contains Amazon affiliate links, meaning we may earn a small commission if you purchase through our links, at no extra cost to you.
Frequently Asked Questions
What are the essential blackstone griddle tips for beginners?
Here are the essential blackstone griddle tips for beginners to get confident fast:
Preheat properly: let the griddle reach the target temperature before you cook. This ensures even heating and easier flipping.
Season and maintain the surface: a light oil layer creates a nonstick patina and protects against rust.
Learn two-zone cooking: keep part of the surface hot for searing and another part cooler for finishing.
Use just enough oil and avoid crowding the griddle; this helps prevent sticking and promotes browning.
Clean and re-season after each session: scrape, wipe, then apply a thin oil coat and heat to re-season.
Start with beginner griddle recipes like eggs, pancakes, and burgers to build confidence.
Safety first: tie back hair, wear heat resistant gloves, and keep kids away from the grill.
How can I apply blackstone griddle cooking techniques for best results?
Mastering blackstone griddle cooking techniques means focusing on temperature control, timing, and workflow. Start with two zone cooking: high heat on one side for searing and medium on the other for finishing. For proteins, pat dry, season well, and sear 2–3 minutes per side, then move to the cooler zone to finish. For vegetables, cut evenly and cook in batches to avoid crowding. Use a sturdy spatula and a metal scraper to move food without sticking. Let grilled items rest a minute before serving to lock in juices. Practice with beginner griddle recipes to dial in times and temps. And remember, keep the surface well seasoned between cooks for easy release.
What are the best griddle maintenance tips to keep my Blackstone in top shape?
Try these griddle maintenance tips to extend life and flavor: After cooking, let the surface cool slightly, then scrape off stuck bits and wipe clean with a damp cloth. Dry completely, then apply a very light coat of high-heat oil and heat to re-season. Avoid soaking or using soap on a seasoned surface. Cover the griddle when not in use and store in a dry area to prevent rust. Regularly check the grease management areas and any hoses or regulators if you have a propane setup. A quick routine after every session keeps your griddle performing like new.
What outdoor cooking tips should I know when grilling on a Blackstone griddle?
Outdoor cooking tips for a Blackstone griddle include setting up on a stable, level surface away from flammable materials and strong winds. Preheat properly, then use a two zone setup to manage searing and finishing. Keep a bottle of water handy for flare-ups and wear heat resistant gloves and long sleeves. Prep mise en place ahead of time and cook in batches to avoid overcrowding. For gear, invest in grilling accessories for blackstone like a sturdy spatula, a scraper, long tongs, an oil mister, a cast-iron skillet for sides, a windscreen or lid if available, and a protective grill cover.
Where can I find beginner griddle recipes and which grilling accessories for Blackstone are worth stocking?
For beginners, try these beginner griddle recipes to build skills: breakfast hash with peppers and eggs, fajita veggies and steak, and simple burgers with onions. Pair with essential grilling accessories for blackstone like a heavy-duty spatula, long-handled tongs, a scraper, an oil bottle or mister, a silicone brush for oil, a cast-iron skillet for side dishes, a grill cover, and heat resistant gloves. These tools make outdoor cooking on a Blackstone griddle easier and more fun. You can always search for more ideas and tips to up your blackstone griddle tips game.
![9 Clever Ways to Repurpose Gas Grill Concepts [DIY Guide]](https://edificatum.com/wp-content/uploads/2026/04/9-Clever-Ways-to-Repurpose-Gas-Grill-Concepts-DIY-Guide-150x150.webp)